This article discusses the different printing options available in Positrak Pro.
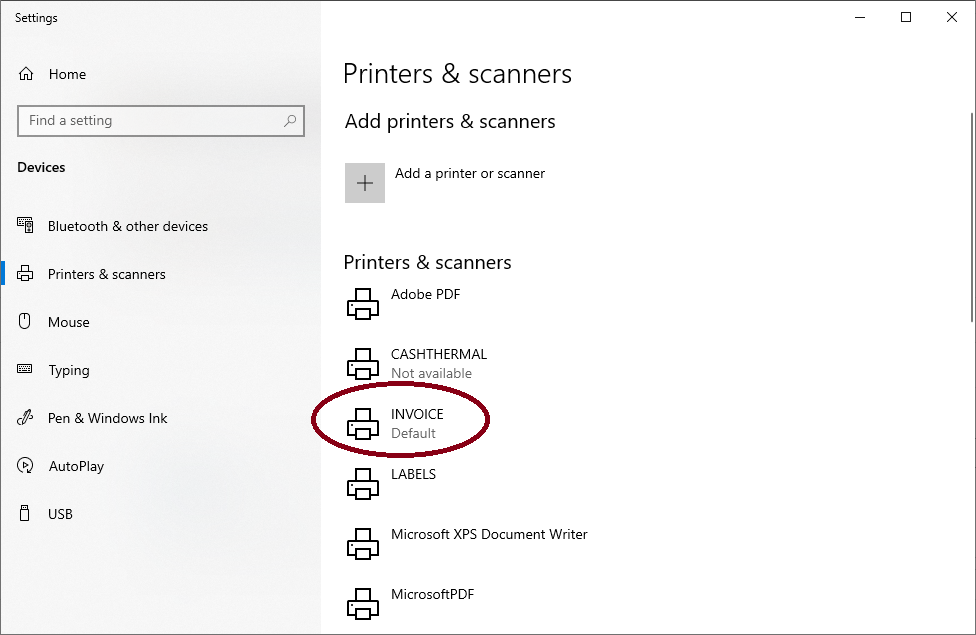
Out of the box, everything is printed to the default printer in Windows, this includes Invoices and Reports. You can see which printer is default by going to Settings in Windows > Printers & Scanners.

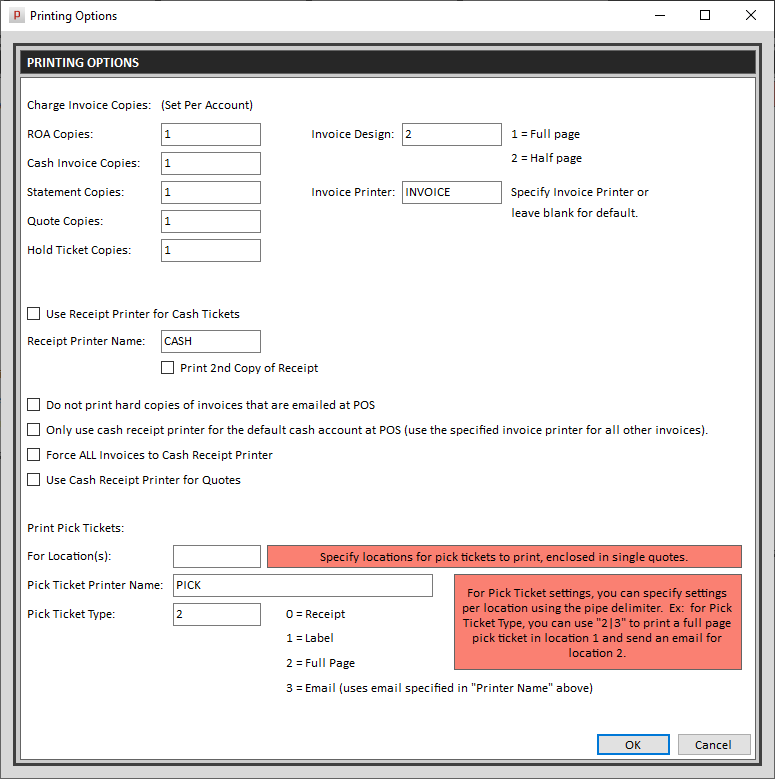
Typically, we set the printer that you want to send reports to as your default in Windows. We then have a way in Positrak Pro preferences to specify a printer name for the Invoice printer. This specified name must match what is installed in Windows (on each workstation) or you will get an error when trying to print an invoice. NOTE: if you get a printer error, do not re-enter the invoice. It is already billed.

There are a few options you can specify on this preference page – # of copies, cash receipt and pick ticket options.
Thermal Receipts
Pro can use thermal receipt printers for cash receipts. This saves wear and tear on your laser printer and saves paper. “Use Receipt Printer for Cash Tickets” must be checked and the receipt printer must be installed. The printer name in Windows must match what you specify here.
By default, it sends all cash invoices to the thermal printer, regardless if they have an account or not. There are a few options here that you can use to modify this.
Our standard supported thermal receipt printer is an Epson TM-T88V or TM-T88Vi. This is about a 3 1/8″ receipt.
Overrides at Point of Sale
When finalizing an invoice, there is a “Special Instruction” text box at the bottom left corner. There are a few options you can enter here and they will do the following:
- P: do not print a hard copy
- C: force the invoice to the thermal receipt printer
- I: force a cash ticket to the laser printer
- X: this is used in conjunction with the Print Listener, and allows a remote user to print an invoice at the store. Note: There is a “Local Settings” option in Preferences to pre-fill this with an X for a remote user.

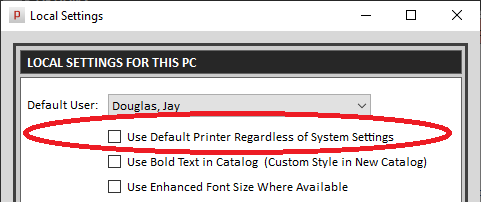
There is one more override function. In “Local Settings” in Preferences, there’s an option to “Use Default Printer Regardless of System Settings” option. This will ignore the specified Invoice Printer name in Preferences. Thermal receipts will still follow their normal rules.

Pick Tickets
The term “Pick Ticket” has evolved over time in Positrak, but it just refers to an alternate version of an invoice that has (been invoiced) or hasn’t been finalized (still a “hold” ticket). This has additional info such as Bin Location, and optional details like pricing (if finalized) and product weight (if specified).
A Pick Ticket can be printed in two ways. If it is still a “hold ticket” you can do it from the Recall screen. Just right click > Print Pick Ticket. If it is already finalized, you can use the “View/Reprint” button in Point of Sale, enter or find the invoice number in the list, and hit the “Pick” button to print.
Pick Tickets can also be printed automatically at the time of billing. If you have a warehouse that is in a separate building or in some way disconnected from the counter, a pick ticket can be printed remotely at that location. There are several options:
- A label (used with Dymo label printers – 450 or 550 Turbo)
- A thermal receipt
- A full page
- Or an email can be sent
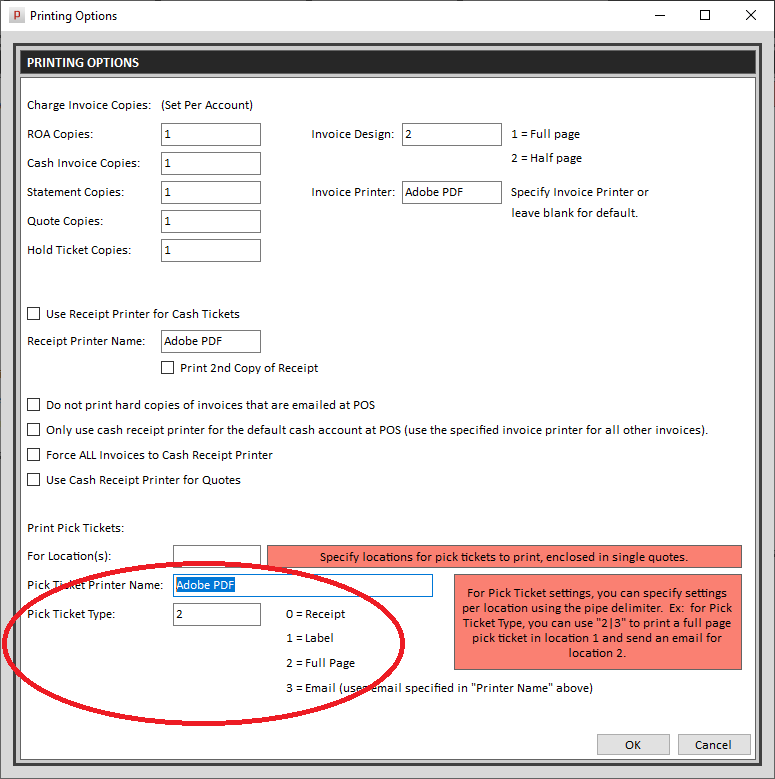
These settings can also be specified in Preferences > Printing Options. Again, the printer name must match what is specified in Windows printer settings. To enable Pick Ticket printing, you must put the location number in the “For Location(s)” text box. In most cases this is just ‘1’.

Label Printing
Positrak Pro also has the ability to print individual part labels. There are two different types. Sheet labels print multiple labels on one page using your existing laser printer. You can use Avery labels that can be purchased online or at any office store. The different labels that are supported are listed in the labels menu in Reports > Generator > Labels Report.
The 2nd type is an individual label that uses either a Dymo LabelWriter 450 or 550 Turbo, or a Zebra GK420d. There are currently three sizes supported and they are shown in the Inventory Screen > Barcode Options > Print Barcode/Labels.

